GitLab 集成 OpenLDAP 账户
一. 集成登录
1)修改 gitlab.rb 配置文件,启用 ldap 登录验证方式
| $ vim /etc/gitlab/gitlab.rb +450
### LDAP Settings
###! Docs: https://docs.gitlab.com/omnibus/settings/ldap.html
###! **Be careful not to break the indentation in the ldap_servers block. It is
###! in yaml format and the spaces must be retained. Using tabs will not work.**
# 在默认配置下增加如下设置
gitlab_rails['ldap_enabled'] = true # 服务开启,启用ldap登录方式
gitlab_rails['ldap_servers'] = YAML.load <<-'EOS' # 通过EOS把服务配置包起来
main: # 'main' is the GitLab 'provider ID' of this LDAP server
label: 'LDAP111' # 页面服务标签名(可自定义)
host: '188.188.4.111' # LDAP服务器地址,域名/IP
port: 389 # 默认端口,SSL为636
uid: 'uid' # 登录-用户名,根据LDAP字段属性
bind_dn: 'cn=Manager,dc=yuikuen,dc=top' # 绑定LDAP完整DN管理域
password: 'Admin@123' # 绑定的DN管理域密码
encryption: 'plain' # 加密方式start_tls/simple_tls/plain
verify_certificates: true # 如加密方式为SSL,此验证会生效
smartcard_auth: false # 认证方式
active_directory: true # 判断是否Active Diretory类型LDAP服务
allow_username_or_email_login: true # 登陆方式用户名或邮箱
lowercase_usernames: false
block_auto_created_users: false
base: 'dc=yuikuen,dc=top' # 以此为基础,进行用户查询
user_filter: '' # 表示以某种过滤条件筛选用户
attributes: # gilab字段与ldap中字段互相对应的值
username: ['cn']
email: ['mail']
name: 'displayName'
first_name: 'givenName'
last_name: 'sn'
## EE only
group_base: ''
admin_group: ''
sync_ssh_keys: false
EOS
|
2)配置完毕后必须重新加载配置,再执行检查命令来确认是否成功
| $ gitlab-ctl reconfigure
$ gitlab-rake gitlab:ldap:check
Checking LDAP ...
LDAP: ... Server: ldapmain
LDAP authentication... Success
LDAP users with access to your GitLab server (only showing the first 100 results)
DN: uid=op001,ou=op,ou=people,dc=yuikuen,dc=top uid: op001
DN: uid=rd001,ou=rd,ou=people,dc=yuikuen,dc=top uid: rd001
Checking LDAP ... Finished
|
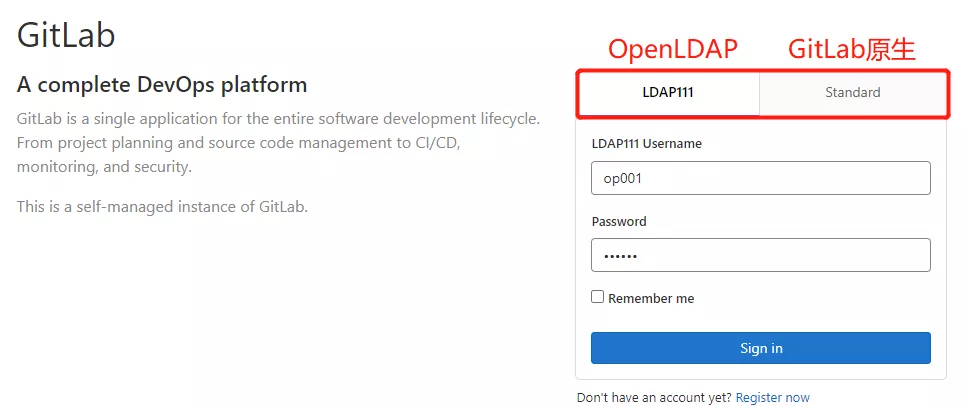
3)打开浏览器,使用上述罗列出来的账户进行登录
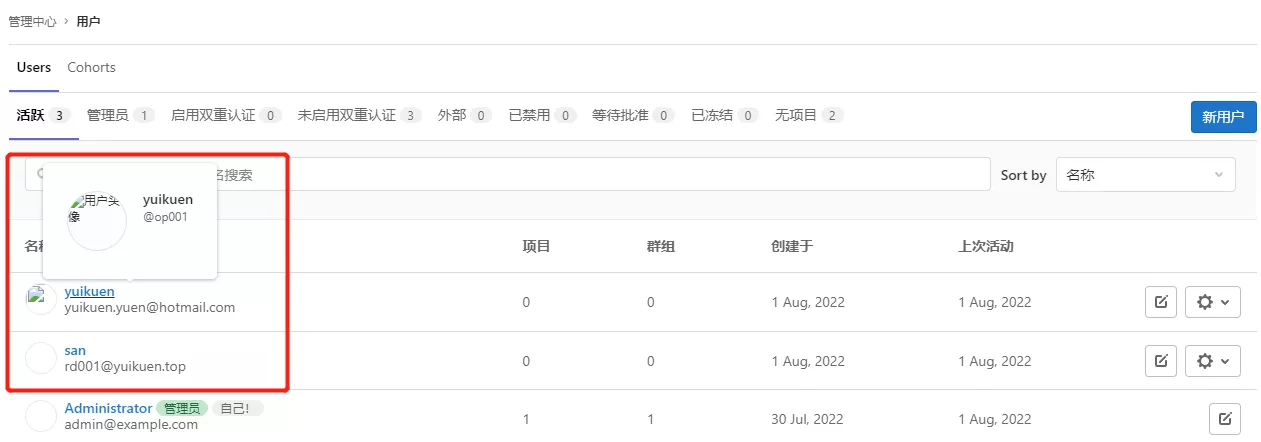
使用原生管理员账户可以进行管理 LDAP 用户权限


二. 集成过滤
上述已实现了 LDAP 账户登录,但默认是所有的 LDAP 账户都能访问。在实际生产环境中,代码仓库应该仅限于开发人员访问使用,下面将演示通过 LDAP memberof 功能来限制指定用户组方可访问代码仓库。
1)修改配置文件的 user_filter 参数,限制仅允许 GitLab 组的账户才能登录

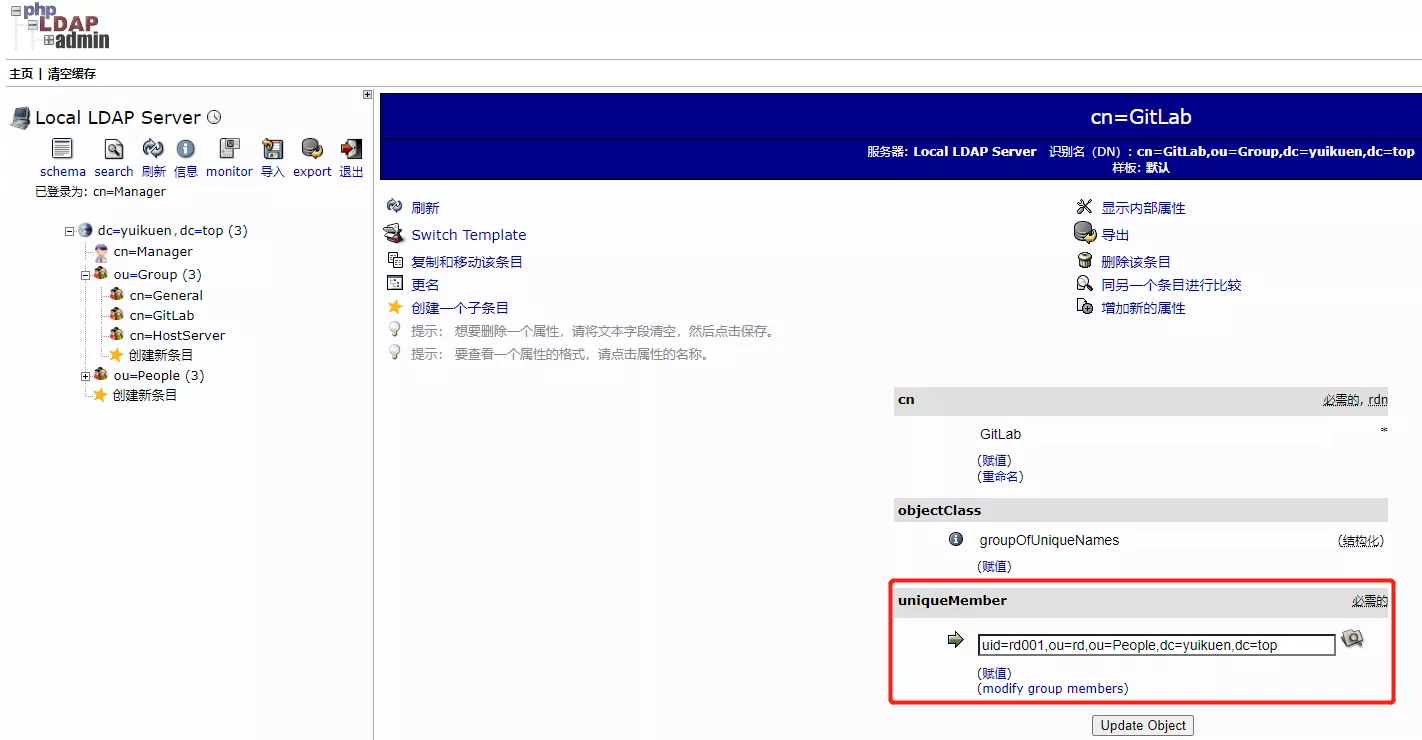
将之前创建的 GitLab 组别人员,仅保留 rd001
| $ cat /etc/gitlab/gitlab.rb
gitlab_rails['ldap_enabled'] = true
gitlab_rails['ldap_servers'] = YAML.load <<-'EOS'
main: # 'main' is the GitLab 'provider ID' of this LDAP server
label: 'LDAP111'
host: '188.188.4.111'
port: 389
uid: 'uid'
bind_dn: 'cn=Manager,dc=yuikuen,dc=top'
password: 'Admin@123'
encryption: 'plain'
verify_certificates: true
smartcard_auth: false
active_directory: true
allow_username_or_email_login: true
lowercase_usernames: false
block_auto_created_users: false
base: 'dc=yuikuen,dc=top'
# 添加memberof判断值,实现分组认证
user_filter: '(memberOf = cn=GitLab,ou=Group,dc=yuikuen,dc=top)'
attributes:
username: ['cn']
email: ['mail']
name: 'displayName'
first_name: 'givenName'
last_name: 'sn'
## EE only
group_base: ''
admin_group: ''
sync_ssh_keys: false
EOS
|
2)重新加载配置,并刷新检查,此时输出的用户只有 uid=rd001
| $ gitlab-ctl reconfigure
$ gitlab-rake gitlab:ldap:check
Checking LDAP ...
LDAP: ... Server: ldapmain
LDAP authentication... Success
LDAP users with access to your GitLab server (only showing the first 100 results)
DN: uid=rd001,ou=rd,ou=people,dc=yuikuen,dc=top uid: rd001
Checking LDAP ... Finished
|

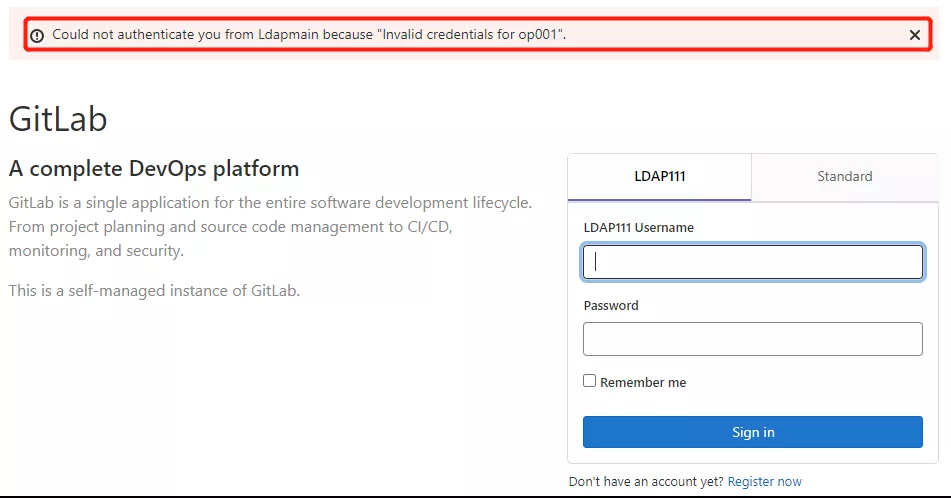
再次使用 ldap 账户登录时,会发现 uid=op001 的账户已无法登录 GitLab
除了自建 ldif 文件方式,也可直接在 Web-Ui 下直接 modify group members 添加、删除用户等操作


